
RECIPE: Fresh Milled Sandwich Bread
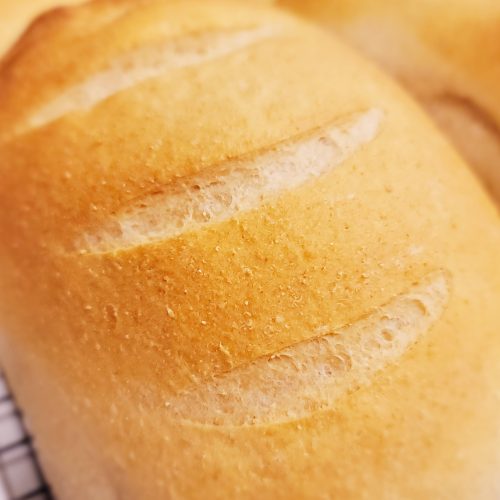
Fresh Milled Sandwich Bread
Make delicious, soft 100% whole wheat bread that you mill at home
Equipment
- 1 Mixer optional
- 1 Mill
- 2 loaf pans
Ingredients
- 900 g Fresh-milled wheat
- 100 G Wheat gluten *Optional – Replace with flour if not using
- 2 Egg
- 450 g Water
- 50 G Melted butter
- 160 G Honey Option: Granulated sugar
- 20 g Salt
- 10 G Instant yeast
Instructions
- Firstly, mill the wheat berries into flour. I use a Vitamix blender, but Nutrimill and Mockmill are popular home-mills. I can speak from experience when I say that the Ninja blender didn't have enough power to get the wheat berries fine enough.
- Next, add the water, melted butter, honey, and salt to a microwave-safe bowl (or in a pot on the stove-top) and heat it up until the butter is melted. I keep my butter on the counter so its usually soft, but if your butter is cold, you can melt it separately and then add those ingredients to it. Give it a gentle stir to mix the solid salt and sugar into the liquid so it doesn't get stuck to the bottom.
- Ensure the liquid isn't too hot (under 100 degrees) and mix in the eggs and the yeast to start bloom. Over the next ten minutes your yeast should rise to the top and take on a fluffy appearance. This ensures your yeast is alive and well. Add your freshly milled flour and salt to the mixer bowl and then pour the liquid into the flour and gently toss the ingredients together. I usually do this by hand to avoid dirtying the paddle attachment, but you can certainly use the paddle if you love doing dishes. Haha.Allow the mixture to rest and absorb for 10 or so minutes. Freshly milled wheat absorbs a bit slower than commercial white flour.
- Using the dough hook, turn on the mixer to the "stir" or level 1 (depending on your brand of mixer). Allow to knead for about 6 or 7 minutes or until the dough seems cohesive and begins to pull away from the sides of the bowl. It may still be stuck to the bottom, though.
- After 7 minutes, your dough should be nearly ready for the bulk proof, but I usually knead by hand another minute or so. Turn out the dough onto a clean work surface. I occasionally need to use a bench scraper to effectively release the still-sticky dough each time I flip it during the kneading process. Using the heal of your hand push down and away from your body into the center of the dough. This is referred to as "pushing".Flip the dough over and bring it close to you again. Fold it in half, rotate it a quarter turn, and then repeat the pushing motion. This helps to evenly distribute the pressure and encourages the development of gluten and keeps it from sticking too severely to your work surface.Kneading is a rhythmic motion. Continue flipping, pushing, folding, and turning the dough. It may feel a bit sticky at first, but avoid the temptation to add more flour immediately. Allow the dough to absorb the moisture.At this point, stretch it out and use the "window pane test" to determine if the dough is ready. Take a small piece of dough and gently stretch it between your fingers. If it forms a thin, translucent "windowpane" without tearing, it's ready.
- Once kneaded, shape the dough back into a ball and place it back into the mixing bowl, or another clean bowl if dish fairies live in your kitchen. Cover it with a damp cloth or plastic wrap to allow it to rise.
- Allow your dough to double in size. The rising time will vary depending on the temperature of your kitchen and how much remaining warmth is still in your dough. Using honey will make your dough rise a bit slower vs using table sugar. It usually takes between two hours in my kitchen in the summer. I have found, though, using honey gives me flexibility. Its really difficult to overproof! When in doubt, let it proof a bit longer. Underproofing is the common culprit of a dense honey-sweetened loaf.But you know what they say, "when life gives you a dense loaf, make bread crumbs!" …just kidding. Mom-jokes aside, homemade breadcrumbs are great for meatloaf, salads, fried chicken breading, you name it. They freeze well, too.
- Once the dough has double, punch it down and turn it out again onto your work surface. Divide the dough in half.
- Working with each individual half, shape the dough. Gently pat or press the dough into a rough rectangle or oval shape. You can use your hands or rolling pin to do this.Starting from the top edge of the rectangle, fold the dough down about two-thirds of the way. Then, fold the bottom edge up to cover the top fold, creating a letter-fold or envelope-like shape.Use your fingers to gently pinch or press the seam where the top and bottom edges meet. This will seal the dough.Rotate the dough 90 degrees so that the seam is now facing you or to one side.Gently shape the dough into a tighter rectangle or oval. You can tuck the sides in as you go to help create tension on the surface of the dough.Starting from the side closest to you, roll the dough away from you, creating a tight, compact cylinder or loaf shape. Ensure it's rolled evenly and with gentle, even pressure.Once you've rolled the dough, pinch or press the seam to seal it securely. Repeat this process until you have achieved enough surface tension and you're satisfied with the shape of your loaf.
- Line your loaf pan with parchment paper and transfer your dough to your pan. Then work on your second loaf and add it to another lined loaf pan. Cover both pans with the damp towel and allow time for its second rise. It usually takes about an hour to nearly double in size. Don't forget to preheat your oven to 350 degrees F about 30 minutes into the second rise!
- Once doubled, carefully put both your loaves into the oven. Don't jostle them too much or you'll risk deflating the rise. That's breadcrumb talk again!
- Bake your loaves for 25 minutes covered. I usually cover with another loaf pan, but you can use loose foil, giving space for additional rising.Then remove lid and bake for another 20 minutes. I rarely test my internal temperature, but it should be 190 degrees F. Remove from oven and immediately remove from the pan. Place your loaves on a wire rack to allow cooling completely before slicing. Or at least wait an hour, if you can.
- Homemade bread will mold quicker than store-bought bread, so once its cooled competely, I put mine in a gallon-sized Ziplock bag and store in the fridge unless I know it will be eaten in the next day or two.